Category Easy Domestic Care

a slightly dusty cream fabric lampshade on an elegant antique brass table lamp

Cleaning Fabric Lamp Shades That Haven’t Been Touched in Years Without Destroying Them

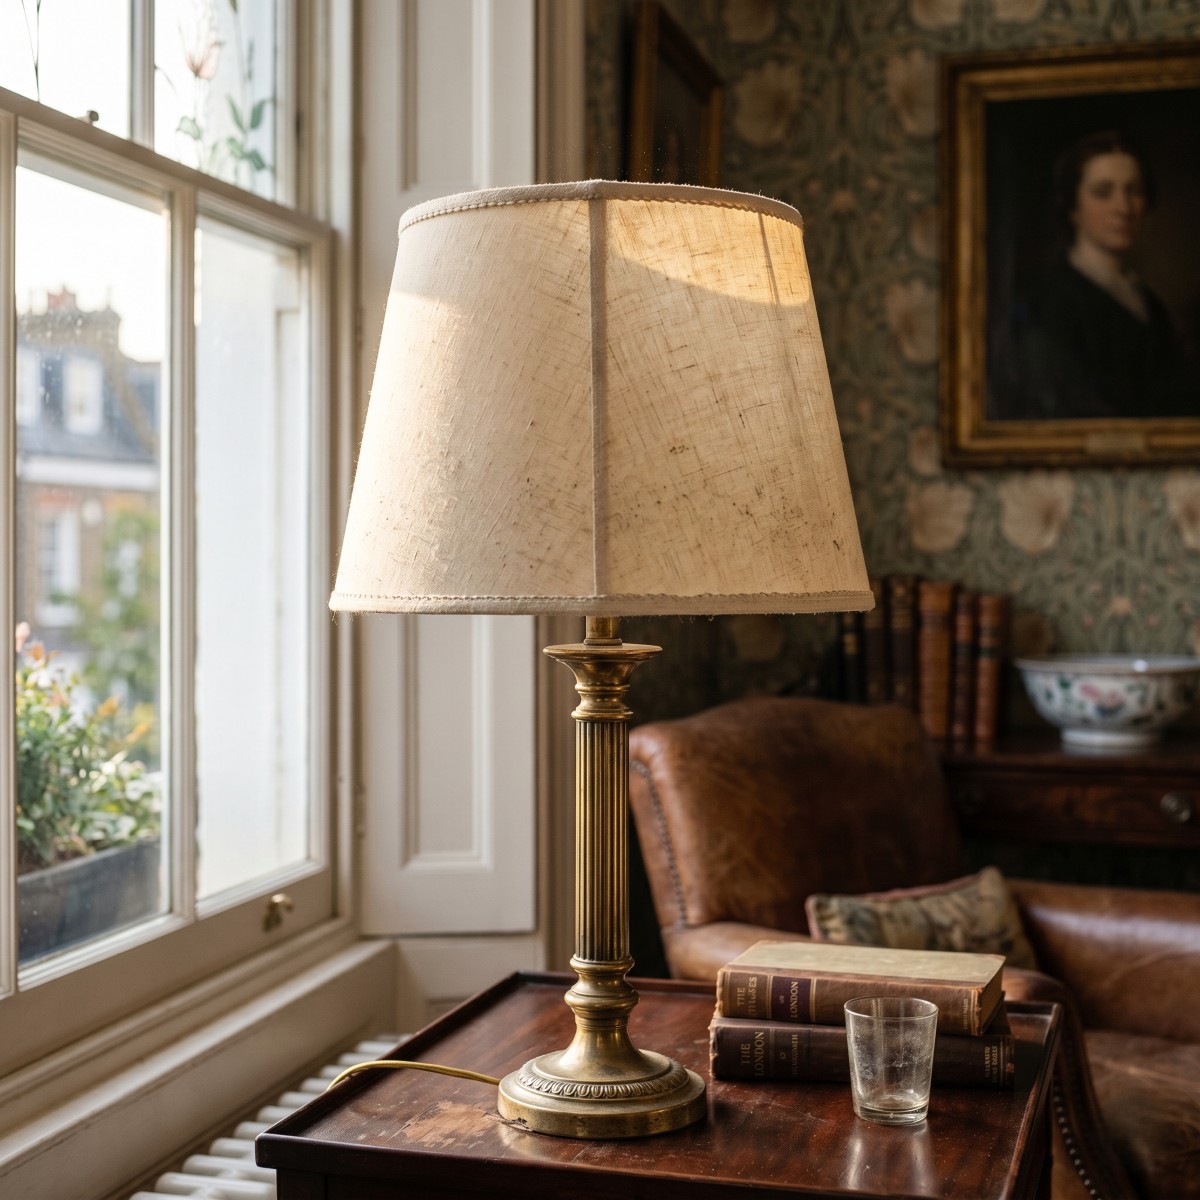
It usually happens on a Sunday afternoon, when the light falls at a particular angle and briefly illuminates everything with the unforgiving clarity of a crime scene investigation. The lamp you have lived with for years is suddenly, inescapably, visibly wrong. The shade is the colour of old newspaper. There is a furring of dust along the top edge that has achieved a kind of geological depth. And there is a yellowish tinge to the fabric that you are not entirely sure can be attributed to dust alone.

The instinct at this point – and it is an instinct that has claimed many a perfectly good lamp shade – is to take it to the sink. Do not take it to the sink. Fabric lamp shades, particularly older ones, are considerably more fragile than they appear, and the cleaning process that will restore them is almost entirely different from the one most people attempt. Here is how to do it properly, and more importantly, how to do it without making things considerably worse.


Why Fabric Lamp Shades Get Into Such a State in the First Place

Part of the answer is simply location. Lamp shades sit above natural eye level, which means they operate in a comfortable blind spot that the brain quietly edits out during the routine visual sweep of a room. Years can pass without anyone consciously registering their condition, which is how a gradual accumulation becomes a dramatic one.

The other part of the answer is heat. Traditional incandescent bulbs – and to a lesser extent halogen bulbs – radiate warmth upward into the shade, which creates a gentle but continuous convection current. This current draws dust in from the surrounding air and deposits it onto the fabric interior and exterior with quiet efficiency. The heat also has a secondary effect: it bakes the dust lightly onto the fabric fibres over time, forming a bond that is meaningfully more resistant to removal than freshly settled dust on a cold surface. The longer it has been left, the more committed that bond becomes. This is why a shade that has not been touched in several years requires a fundamentally different approach from one that is cleaned regularly.


Assess the Shade Before You Touch It

The single most important thing you can do before any cleaning begins is spend two minutes understanding what you are working with, because the type of shade and its condition determine everything that follows.

Check whether the fabric is stitched to the frame or glued. On most older and many mid-range shades, the fabric is adhered with glue – which dissolves in water with a speed and enthusiasm that will leave you with a puddle of fabric and a bare wire frame. You can usually tell by examining the top and bottom edges of the shade closely: stitched attachment will show thread; glued attachment will show a clean, slightly stiff edge where the fabric meets the trim. If you cannot tell, assume glue and proceed accordingly.

Examine the wire frame for rust, particularly at the joins. A rusty frame will transfer orange staining to damp fabric instantly and irreversibly. Check the fabric itself for moth damage – small irregular holes or a thinning of the weave that is disproportionate to the age of the piece – which is more common in natural-fibre shades in older properties than most people expect. And note the fabric type if you can identify it: silk requires the most caution, cotton and linen are more forgiving, and synthetic fabrics are generally the most robust of all.


The Golden Rule: Dry Before Damp, and Damp Before Wet

This is the principle that organises everything else, and it is worth internalising before a single tool is picked up.

Start with the driest possible intervention and only escalate if the result is insufficient. For the majority of fabric lamp shades – and for virtually all older or glued ones – dry methods alone will achieve far more than expected and carry essentially no risk of damage. Damp methods, used sparingly and with genuine restraint, address what dry methods cannot. Wet methods, meaning anything involving running water, submersion, or significant saturation, are appropriate only for a narrow category of modern, stitched, robust shades where you are certain of the construction.

“Damp” in this context means a cloth wrung out so thoroughly that it leaves no moisture on your hand when pressed against it. The moment fabric feels wet to the touch, you have gone too far, and on a glued shade you are now working against a clock before the adhesive begins to release.


The Dry Clean: Getting the Years Off Without Water

For most shades, this stage alone will produce a transformation that is quietly astonishing.

Begin with the vacuum and the softest brush attachment you own, set to the lowest possible suction. Work from the top of the shade downward in overlapping vertical strokes, holding the nozzle just above the surface rather than pressing it against the fabric – contact at higher suction can distort or pull the weave on older or more delicate materials. This removes the loose surface layer that represents the majority of the visible dust.

Follow this with a dry cleaning sponge – sold under names including Absorene and chemical dry sponge, and available from most cleaning supply stockists. This is the tool that professional cleaners reach for on delicate fabric surfaces, and it is not widely known outside the trade. The sponge works through a chemical attraction rather than friction, lifting embedded dust and light surface grime from fabric without any moisture whatsoever. Work in long, light strokes in one direction only, turning the sponge to a clean face regularly. The results on a shade that looked irretrievably grey are, the first time you use one, genuinely startling.

A lint roller makes an effective finishing pass for any remaining fibrous debris, and compressed air – the keyboard-cleaning variety – is useful for dislodging dust from trims, binding edges, and any decorative detailing that the sponge cannot reach cleanly.


Pleats, Gathers, and the Parts That Require Patience

Pleated and gathered fabric shades are in a category of their own, and there is no honest way to present cleaning them as anything other than a slow, methodical process. The upside is that the result is worth it, and that most of the work is dry.

For pleated shades, a soft-bristled watercolour paintbrush – the kind used for fine art work, not decorating – drawn carefully into each pleat is the most precise tool available. Work from the top of each pleat to the bottom in a single stroke, tapping the loosened dust downward. Follow with the dry cleaning sponge applied to the flat faces of each pleat, and the crevice tool on the vacuum – held at a careful distance – to collect what has been dislodged into the folds.

Gathered or ruched shades respond well to the soft brush attachment of the vacuum worked gently into the folds, followed by the sponge on the outer surfaces. The trim at top and bottom, where dust packs densely, benefits from a cotton bud drawn carefully along the inner edge.


Damp Treatment for Stains and Marks That Dry Methods Have Not Shifted

If dry methods have done their work and a mark or discolouration remains, the damp approach can be attempted on shades that have passed the glue and frame assessment above.

Use distilled water rather than tap water – tap water contains minerals that can leave visible tide marks on fabric as it dries, which replaces one problem with another. Add the smallest possible amount of washing-up liquid – a single drop to a cup of water – and apply with a white cloth, using a gentle dabbing motion directly onto the mark. Never rub, which spreads the stain and distorts the weave. Work from the outer edge of the mark inward, and stop the moment the fabric begins to feel more than barely damp.

Allow the area to dry completely at room temperature before assessing whether a second pass is needed. Keep the shade away from direct heat sources while drying, and ensure the wire frame is dried promptly with a separate cloth to prevent any rust transfer.


The Yellow Tinge: What Can Be Fixed and What Cannot

This is the conversation that requires the most honesty, because the yellowing on older fabric shades has two distinct causes that look similar but respond very differently to treatment.

Dust and surface soiling will lift with the dry and damp methods above, and the shade will appear noticeably lighter once they are removed. Thermal discolouration – the deeper yellowing caused by years of heat from incandescent bulbs – is a different matter. This is a change to the fabric fibres themselves rather than a surface deposit, and it cannot be reversed by cleaning. On plain white or cream cotton shades, an oxygen-based fabric brightener used extremely carefully and as a last resort can improve the appearance modestly – but on silk, pleated fabric, or anything with a glued construction, this is not a risk worth taking. Set the expectation realistically: cleaning will reveal what the shade actually is, and what the shade actually is may be a fabric that has been permanently altered by heat over many years.

Switching to LED bulbs at this point is not a consolation prize. LEDs produce virtually no upward heat, which means the cycle of thermal discolouration and dust baking stops entirely. The difference in how quickly a shade deteriorates under LED versus incandescent lighting is not marginal.


Keeping Them Clean Going Forward

The pleasant consequence of cleaning a lamp shade properly is that maintaining it subsequently requires very little effort, provided it is done with some regularity.

A monthly pass with a dry microfibre duster – the telescopic variety that requires no climbing on furniture – takes approximately twenty seconds per shade and prevents the accumulation cycle from re-establishing itself. Feather dusters, despite their photogenic qualities, redistribute more than they remove and are not the right tool here. A lint roller kept near the lamp and used briefly every few weeks is more effective than it has any right to be.

The dry cleaning sponge, used lightly every few months, addresses whatever the duster has not. And with LED bulbs doing their quiet work below, the next time a shaft of afternoon sunlight falls at a revealing angle, the story it tells about your lamp shades should be a considerably more flattering one.

Why Your Skirting Boards Are Always Dusty (And the Quick Daily Fix)

There is a particular brand of cleaning frustration reserved for surfaces that refuse to stay clean regardless of how much attention you give them. The skirting boards belong firmly in this category. You wipe them down thoroughly – properly, on your hands and knees with a good cloth and genuine commitment – and within what feels like forty-eight hours they are wearing a fresh layer of grey dust as though the whole exercise never happened. It is, frankly, demoralising.

The good news is that this is not a reflection of how well you clean. It is a reflection of how air, dust, and painted wood surfaces interact in a room – a set of physical processes that carry on regardless of your efforts, unless you understand them well enough to work with them rather than against them. Once you do, the problem does not disappear entirely, but it becomes dramatically more manageable. Here is the full picture, and the fix that actually holds.


It Is Not Dust Falling – It Is Dust Being Delivered

Most people assume skirting boards collect dust for the same reason a shelf does: gravity pulls particles downward and they land on the nearest horizontal surface. This is partly true, but it is not the main mechanism – and understanding the actual cause is what makes the difference between cleaning that lasts a week and cleaning that lasts a day.

The primary driver is air circulation. In any heated room, warm air rises from the floor level, travels across the ceiling, cools against the outer walls, and descends back down toward the floor. This convection current is gentle and invisible, but it is continuous, and it carries dust particles with it. As the air cools and slows against the lower sections of the wall, it deposits whatever it has been carrying – and the skirting board, positioned precisely at the point where the wall meets the floor, is directly in the landing zone.

This is also why skirting boards on exterior walls – which are cooler – tend to collect dust faster than those on interior walls, and why rooms with underfloor heating, which alters the convection pattern, can be slightly better behaved. The dust is not drifting onto the skirting boards at random. It is being carried there by the room’s own air movement, reliably and repeatedly, regardless of what you do to the boards themselves.


The Static Problem: Why Gloss Paint Is Practically a Dust Magnet

Convection currents explain a great deal, but they do not explain everything. The other significant factor – and the one that professional cleaners develop a particular respect for over time – is static electricity.

Gloss paint, which coats the skirting boards in the majority of London homes, is a poor conductor of electricity. This means it accumulates electrostatic charge on its surface rather than dissipating it, particularly in centrally heated rooms where the air is dry. Dust particles, for their part, carry their own small electrical charges – and opposite charges attract with a persistence that is entirely indifferent to how recently you cleaned.

The practical consequence is that a wiped skirting board does not simply wait passively for dust to land on it. It is actively drawing charged particles toward its surface from the surrounding air. This is why the dust returns so quickly after cleaning and why it tends to cling rather than sitting loosely on top – it is, in a modest but genuine physical sense, being held there.


The Floor-Skirting Gap: The Dust Reservoir You Are Probably Ignoring

The narrow gap between the bottom of the skirting board and the floor surface is its own distinct problem, and one that is often overlooked because it is not especially visible from standing height. This gap – present in most older properties, including a considerable number of the Victorian and Edwardian conversions that make up much of the housing stock across Kensington and Chelsea – collects compacted dust, hair, and debris that does not move when you hoover and does not wipe away with a cloth.

This accumulated reservoir matters because it is not inert. Every time someone walks past, hoovers nearby, or a door is opened and closed, the air disturbance lifts fine particles from the gap and redistributes them – including back onto the face of the skirting board you cleaned this morning. Addressing the skirting boards themselves without addressing this gap is the cleaning equivalent of mopping around a puddle.


Your Hoover Might Be Actively Making Things Worse

This is the one that tends to land badly, so it is worth being direct about it: the exhaust from a vacuum cleaner redistributes dust. The machine captures debris through the suction inlet, but it simultaneously expels a stream of air – filtered to varying degrees depending on the model – from its exhaust, and that air movement disturbs settled particles and puts them back into circulation. In a room where the skirting boards are already working as a dust deposition zone, a hoovering session without the right sequence can leave them worse than before.

The order of operations matters considerably. Skirting boards should always be wiped before hoovering the floor, not after. If you wipe after hoovering, the air disturbance from the machine will have freshly loaded the skirting boards with displaced particles, and your cloth will be cleaning what the hoover just put there. Wipe first, hoover second, and the hoover collects what the cloth has loosened rather than adding to it.


The Deep Clean Baseline: Getting Back to Zero

Before the quick daily fix is worth anything, the skirting boards need to be properly clean to begin with – and if they have been maintained with a damp cloth alone for some time, they almost certainly have a residual film of greasy dust that a microfibre cloth will not shift.

Sugar soap, diluted according to the packet instructions and applied with a wrung-out cloth, cuts through this film effectively on painted surfaces and leaves a genuinely clean base rather than a redistributed one. Work in sections, wiping with the sugar soap solution and following immediately with a clean damp cloth, then a dry one. Pay specific attention to the top edge of the skirting board – the narrow horizontal ledge that runs along the top – which collects dust in a concentrated line and is easily missed. An old, dry paintbrush drawn along this edge first will dislodge what sits there without pushing it onto the freshly cleaned face below.

For the floor-skirting gap, the crevice tool on the hoover is the right instrument. Run it along the full length of every skirting board before any wet cleaning begins.


The Dryer Sheet Trick That Professional Cleaners Rely On

Once the skirting boards are genuinely clean, there is one additional step that makes a meaningful difference to how quickly the dust returns – and it is one that raises sceptical eyebrows until people try it.

Run a tumble dryer sheet along the full length of each skirting board after cleaning. The anti-static compounds in the sheet deposit a thin layer on the painted surface that neutralises the electrostatic charge, removing the magnetic attraction that was pulling charged dust particles onto the gloss. The effect is not permanent – it lasts approximately one to two weeks depending on humidity and room conditions – but during that period the rate at which dust accumulates is noticeably lower. It is not alchemy; it is the same anti-static chemistry that stops your laundry clinging to itself, applied to a different surface. It costs next to nothing and takes ninety seconds.


The Quick Daily Fix That Actually Holds

With clean skirting boards and a freshly applied anti-static treatment, the daily maintenance required to keep them that way is genuinely minimal – two minutes, at most, if incorporated into an existing routine.

The most efficient method is the microfibre-on-foot technique that requires no bending down whatsoever: wrap a dry microfibre cloth around your foot or a flat mop head, and walk the perimeter of the room with a light dragging motion along the skirting boards. This takes under two minutes for the average room and removes the fresh, loosely settled dust before it has any opportunity to compact or develop the static bond that makes it harder to shift. Done daily – or even every other day – it prevents the accumulation cycle from establishing itself at all, which is a fundamentally different strategy from the periodic deep clean followed by rapid re-dusting that most people default to.

The best time to do it is just before hoovering, keeping the sequence consistent: skirting boards first, floors second.


When the Kitchen and Bathroom Boards Need a Different Approach

Skirting boards in kitchens and bathrooms present a variation on the problem that is worth addressing separately. Kitchen skirting boards collect not just dust but airborne grease, which bonds with dust particles and creates a compound residue that is considerably more tenacious than dry dust alone. Standard damp-cloth maintenance will not shift it; sugar soap or a diluted degreasing solution is needed, and it is needed more frequently than in other rooms.

Bathroom skirting boards, meanwhile, contend with moisture and the mould that follows it in poorly ventilated spaces. A solution of white vinegar and water used in place of plain water for the regular wipe-down inhibits mould growth without damaging the paint, and is a sensible routine measure in any bathroom where condensation is a recurring feature. These two rooms merit their own cleaning schedule rather than being folded into the general household approach – and in both cases, the gap at the base of the board should be checked and cleared more often than elsewhere in the home.

modern kitchen blender placed centrally on a clean quartz kitchen island

How to Clean Your Blender Base When Smoothie Has Leaked into the Motor Housing

You know something has gone wrong before you even look. There is a smell – warm, sweet, and faintly sour – coming from the kitchen, and it is the specific smell of mango and banana doing something they should not be doing inside an electrical appliance. You lift the blender jar, and there it is: a sticky halo of smoothie residue around the base, a suspicious discolouration in the motor vents, and the dawning realisation that at some point during this morning’s enthusiastic health kick, something leaked somewhere it absolutely should not have.

It is one of the more quietly distressing small domestic discoveries – not dramatic enough to constitute a crisis, but awkward enough to make most people either ignore it until the smell becomes impossible to justify, or reach for the kitchen tap in a way that would make any electrician wince. Neither approach is correct. Here is what actually is.


Why Smoothie in the Motor Housing Is a Bigger Problem Than It Looks

The motor housing of a blender is not, it bears saying plainly, waterproof. It is designed to keep incidental splashes off its exterior, not to contain liquid that has found its way through the blade assembly and into the internal workings. The moment smoothie breaches that boundary, you are dealing with something more serious than a surface cleaning job.

The particular menace of smoothie – as opposed to, say, water – is its composition. Fruit-based blends are rich in natural sugars, which are sticky, hygroscopic, and enthusiastic about fermentation. Once inside the motor housing, that sugary residue begins to dry onto electrical contacts and internal components, leaving a film that attracts moisture, promotes mould growth, and – in a worst case that is unfortunately not especially rare – causes corrosion over time. The burning smell that accompanies a blender with compromised internals is not just unpleasant; it is the motor working harder than it should to overcome resistance it was never designed to encounter.

Addressed promptly and correctly, this is a very manageable problem. Left alone, it becomes an expensive one.


Before You Do Anything: Unplug It and Leave It Unplugged

This is non-negotiable and worth stating before any cleaning advice whatsoever: unplug the blender from the wall immediately, and do not plug it back in until you are completely certain the motor housing is dry. Not mostly dry. Not dry enough. Completely dry.

Liquid and live electrical components have a relationship that does not end well for anyone involved, and the motor housing of a blender contains both metal contacts and wiring that will not distinguish between a tiny amount of residual moisture and a more dramatic quantity of it. The drying stage at the end of this process is at least as important as the cleaning stage – and the temptation to test whether the blender still works before it is fully dry is one to resist firmly.

Assess the extent of the leak before you begin. Tilt the base gently and look at the vent openings on the underside and sides. If there is visible liquid pooling inside, blot what you can reach with a folded piece of kitchen paper before proceeding. If the leak appears extensive – liquid audibly moving inside the housing when tilted – the drying period at the end will need to be correspondingly longer.


What You Will Need

This is not a job for the kitchen cloth and a splash of washing-up liquid. The tools that make it possible to clean a motor housing safely and effectively are specific, and most of them are already somewhere in the house.

You will need cotton buds – generously, not one or two – along with a soft-bristled old toothbrush, a microfibre cloth, distilled white vinegar, bicarbonate of soda, and a supply of kitchen paper. A can of compressed air, of the sort sold for cleaning keyboards, is genuinely useful here and worth having in the house if you do not already; it does work that no physical tool can replicate in a narrow vent. Everything should be applied sparingly and with a light touch. The goal is careful, targeted cleaning – not saturation.


The Cleaning Process: Working Methodically from the Outside In

Start with the Exterior

Dampen a microfibre cloth with a solution of equal parts white vinegar and water – damp, not wet, meaning wrung out firmly before it touches the appliance – and wipe down the entire exterior of the base. Pay particular attention to the seam where the jar sits on the base, which is typically where the initial leak has occurred and where residue tends to accumulate in a sticky ring. Work the cloth into this seam carefully, using a cotton bud for anything the cloth cannot reach.

The rubber feet on the underside of the base are worth checking too. Smoothie has a talent for wicking beneath them, where it sits quietly and grows mould with minimal interference. Lift each foot if possible and clean beneath it.

Cleaning the Vents

The vents are where patience becomes genuinely necessary. These are the narrow openings – usually on the underside or lower sides of the housing – through which the motor breathes, and they are precisely the route through which leaked smoothie travels toward the internal components.

Use a dry cotton bud first, working it carefully into each vent opening with a gentle rotating motion to collect any dried residue. Replace the bud frequently – you will go through more than feels reasonable, and that is fine. Follow with a cotton bud very lightly dampened with the vinegar solution for anything that remains, then a final dry pass. If you have compressed air, a short burst directed into each vent after the manual cleaning will dislodge residue from areas the cotton bud cannot physically access, and the results are satisfying in a way that is difficult to adequately explain.

Do not use a toothbrush directly on the vent openings – the bristles are too wide to be precise and risk pushing residue further in rather than drawing it out.


Dealing with Dried or Fermented Residue

If the leak was not discovered immediately – or if the blender has been quietly fermenting on the worktop for a day or two – the residue inside the vents and around the seams will have hardened and potentially begun to smell in the way that only fruit sugar actively decomposing can manage.

A paste of bicarbonate of soda and a small amount of white vinegar, applied to the exterior seam and any accessible hardened residue with a toothbrush, will break down even fairly committed dried smoothie. Work it in with light circular strokes, leave it for two to three minutes, then wipe away with a damp cloth followed immediately by a dry one. For vent residue that has hardened, a cotton bud dampened with undiluted white vinegar and held against the residue for thirty seconds will soften it sufficiently to remove. Repeat as necessary – older residue may need two or three passes.

The smell of fermented fruit inside the housing can linger even after the physical residue has been removed. Leaving a small open dish of bicarbonate of soda next to the blender base during the drying period helps considerably.


Drying: The Step That Decides Everything

Once cleaning is complete, the motor housing needs to dry thoroughly before the blender is used again – and thoroughly means more than an hour on the worktop. The internal components of a motor housing retain moisture in ways that are invisible from the outside, and the airflow through the vents that makes the motor function also makes complete drying slower than it appears.

Place the base upside down on a clean, dry surface in a warm room – an airing cupboard is useful here, provided it is not near a source of steam. Leave it for a minimum of twenty-four hours. If the initial leak was significant, forty-eight is a more sensible target. Before plugging back in, give the vents a final pass with compressed air or a dry cotton bud, and check for any remaining odour. A motor housing that still smells of smoothie is a motor housing that is not yet fully dry.


How to Stop It Happening Again

The most common cause of smoothie in the motor housing is not a manufacturing defect – it is overfilling. Most blender jars have a maximum fill line that exists for a reason, and that reason is that liquids expand and pressurise when blended at speed. Dense smoothies with frozen fruit, nut butters, or thick yoghurt are particularly prone to forcing liquid downward through the blade gasket when the jar is overfilled.

Check the rubber gasket – the seal that sits between the blade assembly and the jar – regularly. It should be pliable, intact, and seated evenly. A gasket that has hardened, cracked, or shifted out of position will leak under pressure regardless of how carefully you fill the jar. Replacements are available for most blender models and are among the cheaper maintenance purchases it is possible to make.

Blending dense mixtures in short pulses rather than a sustained run reduces the pressure that builds in the jar, and adding liquid to the base before frozen or solid ingredients makes the whole process considerably less mechanically stressful on the seal.


When the Damage May Already Be Done

If the leak went unnoticed for some time, or if the blender is showing signs of distress beyond the smell, it is worth knowing what to look for before assuming a thorough clean has resolved everything.

A burning smell that persists after the first use post-cleaning, inconsistent motor speeds, a blender that trips the kitchen circuit, or any visible sparking are all signs that the internal components have sustained damage that cleaning cannot address. At that point, the question is repair versus replacement – a decision worth taking to the manufacturer or an appliance repair service rather than making unilaterally with a screwdriver and optimism. Some blenders are worth repairing. Others are an opportunity to reconsider whether the model with the better gasket design might be the wiser long-term investment.

How to Make Your Kitchen Look Clean When You Only Have 10 Minutes Before Guests Arrive

The text arrives and your stomach does something unpleasant. “Just leaving now – see you in ten!” And there you are, standing in a kitchen that tells the story of the past four days in considerable detail. The hob has opinions. The sink is expressing itself. There is something in the compost caddy that has quietly developed ambitions. You had every intention of sorting it before they arrived, and yet here we are, staring down the clock like a contestant on a gameshow where the prize is not dying of embarrassment in front of your friends.

Here is the good news: ten minutes, handled correctly, is enough. Not enough to deep clean – let us be absolutely clear about that – but enough to create the impression of a kitchen that is lived in by a competent adult who simply had a busy week. That is the goal. That is the whole game.


Clean and Guest-Ready Are Not the Same Thing – And That Is Fine

Before a single cloth gets picked up, it is worth establishing something important: you are not trying to pass a hygiene inspection. You are trying to satisfy the visual sweep that a guest performs when they walk into a kitchen – consciously or otherwise – in the first three to five seconds. That sweep is looking for specific things: clear worktops, a presentable sink, a clean hob, and a floor that does not suggest a small but significant incident has recently taken place. It is not looking at the inside of your cupboards, the tiles behind the extractor fan, or whether you have alphabetised your spice rack.

Understanding this distinction is what separates productive ten-minute cleaning from the kind of frantic, unfocused activity that ends with you having reorganised a single drawer while the worktops remain catastrophic. Visual impact has an address in a kitchen, and it is not behind closed doors. Work out where it lives and put your ten minutes there exclusively.


The First Two Minutes: Clear the Visible Chaos

Everything comes off the worktops. Everything. The pile of post that has been staging a quiet occupation since Tuesday, the olive oil that lives out because you use it every day, the fruit bowl with two slightly philosophical-looking bananas in it – all of it either goes away properly or gets relocated somewhere a guest is unlikely to look. The oven is a time-honoured emergency staging area and there is absolutely no reason to feel guilty about it, provided you remember things are in there before the next time you preheat.

Deal with the washing up with ruthless pragmatism. If the dishwasher has space, load it. If not, stack everything neatly in the sink or on the draining rack – a tidy pile of things waiting to be washed reads very differently from the same items sprawled across the worktop in a way that suggests surrender. Run the hot tap briefly, add a squirt of washing-up liquid, and let the water and foam occupy the basin while you move on. It creates the impression of a sink that is actively mid-process rather than passively neglected, and the distinction matters more than it logically should.


Worktops: Where the Entire Impression Lives

A clean worktop is the single most powerful tool in the ten-minute arsenal – disproportionately, almost unfairly so. A kitchen with clear, wiped surfaces and an imperfect floor will read as considerably cleaner than one with spotless floors and cluttered, sticky worktops, because the worktop is what sits at eye level, under the lights, directly in the line of sight of anyone standing in the room.

Once everything has been cleared, spray an all-purpose cleaner generously across every visible surface and wipe in long, confident strokes with a clean cloth – not the one that lives permanently by the sink and has seen things, but a fresh one from the drawer. Do the splashback as well; it takes fifteen extra seconds and the difference is immediately visible. If the hob has residue from recent cooking, a few seconds of targeted attention with the cloth will remove at least the visual evidence. Do not attempt to descale it. You are not restoring it – you are making it look as though someone capable is in charge, and that is sufficient for this evening’s purposes.


The Sink: The One Thing That Can Undo Everything Else

Guests look at the sink. They always look at the sink. It is not a conscious decision – it is simply where the eye travels, in the same involuntary way it moves towards a television in a room even when the television is off. A dirty, cluttered sink will quietly undermine every other effort you have made in the preceding seven minutes. A clean one, conversely, communicates a general sense of domestic competence that extends well beyond the basin itself and colours the entire impression of the room.

Rinse it out thoroughly, wipe around the basin and the taps with a cloth, and then – this is the step most people skip – dry it. A dry sink looks dramatically cleaner than a damp one, and the extra thirty seconds it takes is among the best-spent of the entire operation. Move the washing-up sponge somewhere it cannot be seen. Consolidate the cluster of half-empty washing-up liquid bottles that has accumulated on the edge and put them under the sink. Polish the tap until it has at least some reflective quality. The whole thing takes ninety seconds and the return on that investment is, genuinely, remarkable.


The Floor: Work the High-Impact Zones

A full mop is not happening, and that is entirely acceptable. What is on the table is a targeted pass with a dry mop or a quick sweep of the specific zones that guests will actually register: in front of the hob, around the bin, and the stretch of floor between the door and the main worktop area. These are where debris accumulates most visibly and most rapidly, and addressing them alone – while leaving the bits tucked beneath the units entirely alone – achieves approximately eighty percent of the visual benefit in roughly twenty percent of the time.

If the floor has something more emphatic on it – a splash from earlier cooking, a wine ring from the night before – address that specifically with a damp cloth. One obvious, localised mark is considerably more damaging to the overall impression than a generally imperfect floor, and takes ten seconds to deal with.


Smell Is Half the Battle

A kitchen can be visually immaculate and still feel thoroughly uninviting if it smells of yesterday’s dinner, an overdue bin, or a compost caddy that you have been meaning to empty since the weekend. Smell is processed before sight in the hierarchy of first impressions, and no amount of worktop-wiping addresses it.

Take the bin out, or at the very minimum place a new liner over the top of whatever is in there and secure it. Move the compost caddy outside or under the sink if it is contributing to the atmosphere in any meaningful way. Then run a small pan of water on the hob with a halved lemon or a cinnamon stick – not a dramatic quantity, just enough to put something warm and intentional into the air within the next few minutes. Open a window briefly if the weather permits. Fresh air is the most straightforward solution available, and the only one that does not risk the kitchen smelling inexplicably of synthetic sea breeze, which raises more questions than it answers.


The Finishing Touches That Punch Above Their Weight

With a minute or two left on the clock, a small number of details separate a kitchen that is merely tidy from one that feels genuinely considered.

Hang a clean, freshly folded tea towel on the oven handle – it is the domestic equivalent of a pocket square and does an outsized amount of work for something that takes four seconds. Remove the drying rack if it is occupied by things that have technically been dry since earlier in the week. Wipe the fronts of the oven and any appliances on the worktop, because fingerprints and grease marks on chrome and dark surfaces are visible from a distance that will surprise you. If the kitchen has a dimmer switch, use it – softer lighting is the interior equivalent of a generous edit, and there is absolutely no shame in deploying it strategically.


The Full Sequence, Timed

Because ten minutes spent without a plan is eight minutes of productive cleaning and two minutes of standing in the middle of the room holding a cloth and wondering what to do next, here is the order that makes every minute count.

Minutes one and two: everything off the worktops, washing up dealt with, sink given a first rinse. Minutes three and four: spray and wipe all worktop surfaces and the splashback, then the hob. Minutes five and six: full sink clean – rinse, wipe, dry, tap polished, sponge hidden. Minutes seven and eight: floor sweep of high-traffic zones, any obvious individual marks addressed. Minute nine: bin dealt with, compost caddy removed, something warm started on the hob if time allows. Minute ten: clean tea towel on the oven handle, drying rack cleared, appliance fronts wiped, lighting adjusted.

Then stand at the kitchen doorway and look at the room the way a guest would in the first three seconds. If the worktops are clear, the sink is presentable, and it smells like somewhere a person with their life broadly together might reasonably live, you are done. Greet your guests, put the kettle on, and do not – under any circumstances – let anyone open the oven.

How to Deep Clean a Studio Flat When Your Bed Is Also Your Sofa and Dining Table

The estate agent described it as a “thoughtfully designed pied-à-terre with a versatile open-plan layout and excellent transport links.” What they meant, of course, was a single room in which you are currently eating cereal, watching television, and sitting on your own pillow simultaneously. The London studio flat is a masterpiece of spatial compromise – a place where the boundary between bedroom, living room, and dining area is not so much blurred as entirely absent, and where the phrase “I’ll eat at the table” means shuffling eighteen inches to the left.

Living in one is a perfectly reasonable and often genuinely enjoyable way to occupy a city as expensive as London. Deep cleaning one properly, however, requires a completely different approach – because the advice written for three-bedroom semis simply does not translate.


Why Studio Flat Cleaning Is a Different Beast Entirely

Standard deep-clean guides are built on an assumption that rooms have dedicated purposes. Clean the kitchen. Vacuum the bedroom. Wipe down the dining table. Useful advice, if your kitchen, bedroom, and dining table are three separate things in three separate rooms. In a studio flat, they are quite possibly the same surface, addressed at the same time, in the same square metre.

The problem runs deeper than mere convenience. Multi-use surfaces accumulate multi-use grime. The sofa that is also your bed collects body oils, dead skin cells, and the warmth of sleep at night, then coffee rings, food crumbs, and laptop heat during the day. That is not a sofa problem or a bed problem – it is both, layered on top of each other, requiring solutions that address all of it at once. Generic advice that treats each surface as having a single purpose will always leave something behind.

There is a psychological dimension worth acknowledging, too. Mess and dirt feel more oppressive in a small, all-purpose room than they ever would spread across several. There is no other room to close the door on – which is partly why studio flat cleaning tends to either happen obsessively or not at all. This guide is for everyone who has arrived at “not at all” and is ready to do something about it.


Declutter Before You Even Think About Cleaning

In a studio flat, clutter is not merely an aesthetic inconvenience – it is a physical obstacle to doing the job properly. You cannot clean a surface you cannot reach, and in a single-room space, objects have a particular talent for spreading themselves across every available horizontal plane with the quiet confidence of a sitting tenant.

Before any cleaning product comes out, do a full pre-clean sort. The method that works best in a limited space is to designate the bathroom as a temporary staging area: everything that does not belong on the surface you are about to clean goes in there while you work, then returns to its proper place once the main room is done. It sounds fussy, but it takes ten minutes and makes everything that follows considerably more effective.

Be honest with yourself during this stage. A studio flat that has been simultaneously functioning as an office, bedroom, and dining room for the past week will have accumulated the debris of all three. A takeaway bag under the coffee table, a notebook on the pillow, three mugs that migrated from the kitchen and apparently decided to stay – all of it needs addressing before the actual cleaning begins. Start with a clear surface, or do not bother starting at all.


The Multi-Use Furniture Problem – Deep Cleaning What’s Doing Three Jobs at Once

This is the section that most cleaning guides skip entirely, which is rather unhelpful given that the sofa-bed-occasional-dining-table is the defining feature of studio flat life. The challenge with furniture that serves multiple purposes is that it accumulates multiple categories of grime – and needs to be treated accordingly.

Upholstery That Has Seen Too Much

Begin with the vacuum and the upholstery attachment – not a quick pass, but a systematic one. Work in strips across the seat, back, and arms, then swap to the crevice tool for the joins between cushions, the gap where the seat meets the back, and any fold-out mechanism if the piece converts to a bed. This is where crumbs, hair, and the miscellaneous debris of daily life go to retire, and it needs to come out before anything wet touches the surface.

Spot-treat any visible stains next – an upholstery-appropriate cleaner for fabric, or a solution of washing-up liquid and warm water applied sparingly and blotted rather than rubbed, always working inward from the edges of the stain. Once any marks have been addressed, sprinkle bicarbonate of soda generously over the entire surface, work it lightly into the fabric, and leave it for several hours – overnight is considerably better. Vacuum it off thoroughly the following morning. The bicarb draws out the odours that accumulate, with impressive efficiency, when a piece of furniture is simultaneously where you sleep and where you eat toast.

Do not overlook the underneath and the back. In a studio flat, the floor around and beneath the sofa-bed is some of the most heavily used in the entire flat, and the dust and debris gathered there reflects that accordingly.

The Mattress Beneath It All

A mattress that doubles as a sofa is exposed to a great deal more than sleep – it absorbs pressure from sitting upright, spills from meals balanced on knees, and general daytime living in a way that a conventionally used mattress simply does not. Strip the bed completely, vacuum the top surface, the sides, and both ends using the upholstery attachment, then treat any stains with a diluted washing-up liquid solution for general marks, or a bicarbonate of soda paste for anything more organic in nature. Leave bicarb on the surface for several hours before vacuuming off thoroughly, then air the mattress as long as the room allows before remaking.

If a mattress protector is not already in use, it is a modest and genuinely worthwhile investment that makes every subsequent clean considerably less involved.


The Kitchen That Shares a Postcode With Your Pillow

The galley kitchen or kitchenette in a studio flat presents a challenge that has nothing to do with its size and everything to do with its location. In a larger home, cooking smells, grease particles, and airborne food debris stay in the kitchen. In a studio flat, they travel approximately two metres and settle contentedly onto the bedding, the sofa, and every fabric surface in the room. This is why the kitchen component of a studio deep clean matters well beyond the kitchen itself.

Work through the hob, splashback, and surrounding surfaces with a good degreasing cleaner, paying particular attention to the sides of appliances where grease accumulates in patient, invisible layers over time. For the microwave interior, a bowl of water with a halved lemon microwaved for a few minutes loosens residue remarkably effectively and makes the subsequent wipe-down considerably less grim. Then address the extractor fan filter – which in most studio kitchens has not been properly cleaned since the previous tenant and is now doing very little useful extracting at all.

Keep the window open throughout, and for a meaningful stretch afterwards. Ventilation matters more here than in any other domestic context.


Floors, Skirting Boards, and the Square Footage You’ve Been Negotiating Around

Cleaning the floor of a studio flat properly means moving things rather than cleaning around them. Furniture that in a larger flat could reasonably stay put for months needs to be shifted here – because every inch of floor is in daily use and gathers grime at a corresponding rate.

Move what can be moved, vacuum thoroughly including along the skirting boards and into corners, then mop hard floors with an appropriate cleaner, working backwards towards the door to avoid stepping on clean surfaces. For carpeted studios, a thorough vacuum in multiple directions followed by a carpet deodorising treatment will address the particular combination of smells a single-room living space generates over time.

Skirting boards warrant specific attention. In a well-used studio flat they collect dust, scuffs, and the general residue of daily life at floor level – and they are cleaned less frequently than almost any other surface in the home.


Windows and Walls – The Vertical Surfaces That Carry More Than You Think

In a small space, clean windows do a disproportionate amount of work. Natural light in a studio flat is not merely pleasant – it is doing the heavy lifting of making one room feel like more than one room, and grimy glass muffles it noticeably. Clean both sides where accessible, using a streak-free glass cleaner or the dependable white vinegar and water solution, and dry with a microfibre cloth rather than paper, which leaves lint and largely defeats the purpose.

Walls in a studio flat accumulate marks, grease, and dust at a higher rate than in rooms with singular purposes. A wipe-down with a diluted all-purpose cleaner on a well-wrung cloth – with particular attention to the wall behind the bed-head, above the kitchen area, and around the door frame – removes a surprising quantity of accumulated grime and lifts the entire room in a way that is immediately, disproportionately satisfying.


Tackling Odours When There Is Nowhere for Them to Go

A room in which you sleep, cook, and spend the majority of your waking hours will smell like all of those things at once – and with no walls to separate them, those odours combine freely. The specific experience of a Sunday morning in a studio where someone was generous with garlic on Saturday night requires no further elaboration.

The distinction that matters here is between masking odours and eliminating them. Scented candles and plug-in air fresheners are emphatically doing the former. Bicarbonate of soda left in an open dish near the main offenders – the bin, the sofa-bed, the kitchen area – does the latter, absorbing airborne compounds rather than simply layering something that claims to smell like a linen cupboard over the top of them. Activated charcoal sachets placed around the flat work on the same principle and last considerably longer between replacements.

And proper airing – windows open for a meaningful duration, not the thirty seconds it takes to check whether it is raining – remains the single most effective odour management tool available, at no cost whatsoever.


The Cleaning Sequence That Makes a Studio Flat Actually Work

Sequence matters in any deep clean, but in a studio flat it is the difference between a job well done and redoing half of it. Dust and debris dislodged from one surface will immediately settle on another when there are no walls between them – so the order in which you work is far from arbitrary.

Start at the top: ceiling corners for cobwebs, light fittings, the tops of shelves and furniture. Work downward through walls and windows, then surfaces, then furniture, and finally floors. Always complete dry cleaning – dusting and vacuuming – before wet cleaning, so that anything disturbed can be captured before damp cloths press it onto a surface that is now clean.

Address soft furnishings early in the process so that bicarbonate of soda treatments have maximum time to work while you clean everything else around them. Floors come last, without exception.

A thoroughly deep-cleaned studio flat is, it has to be said, one of the more rewarding results in the entire cleaning repertoire. When every surface is clean, the whole room is clean – and in a space that is required to be everything at once, that particular transformation is both immediate and genuinely felt.

a well-used wooden chopping board placed on a polished granite countertop on a central kitchen island in a modern standard London kitchen

Getting Red Wine Stains Out of Wooden Chopping Boards: Methods That Won’t Damage the Wood

A wooden board doing double duty as a cheese and charcuterie spread is one of those effortlessly elegant moves that Chelsea kitchen suppers are built on. Prosciutto at one end, a decent wedge of Comté at the other, and someone’s generously filled glass of Barolo positioned just close enough to the edge to make the whole thing feel like a foregone conclusion. One enthusiastic reach for the grapes later, and your beautiful board is wearing rather more of the wine than the guests are.

It is a frustratingly common scenario – and the instinct to grab the nearest cloth and scrub is almost always the wrong one. Red wine stains on wood are stubborn, but they are not permanent. With the right approach and the right materials, you can remove them cleanly without bleaching, drying out, or otherwise punishing a board that probably cost considerably more than it should have.


Why Red Wine Stains Wood So Stubbornly – And Why That Matters Before You Start

Before you reach for anything, it helps to understand exactly what you are dealing with – because this is not simply a surface spill.

Red wine contains two compounds that conspire against you simultaneously. The first is tannins, naturally occurring polyphenols that bind aggressively to porous materials on contact. The second is anthocyanins, the deeply pigmented molecules responsible for red wine’s colour, which derived from dark-skinned grape varieties and which penetrate absorbent surfaces with remarkable efficiency. Wood, being a naturally porous material threaded with microscopic grain channels, offers these molecules an open invitation.

The moment wine meets an untreated or lightly oiled wooden surface, it does not simply sit there waiting politely to be wiped away. It is actively wicking deeper into the grain with every passing second, carried along by capillary action. This is why the distinction between a fresh stain and a set one matters so much: you are not just cleaning a surface, you are trying to draw pigment back out from within the material itself. Everything that follows is shaped by that reality.


Act Fast – The Golden Window for Fresh Red Wine Stains

If the wine has only just landed, you have a genuine advantage – and roughly ten to fifteen minutes to use it properly. During this window, the anthocyanins have not yet fully migrated into the deeper grain channels, and a swift, controlled response can remove the bulk of the stain before it becomes a longer project.

The single most important instruction here is one that feels counterintuitive in a moment of mild panic: blot, do not rub. A clean cloth or a thick wad of kitchen paper pressed firmly onto the stain will lift considerably more wine than any amount of vigorous scrubbing – which, incidentally, spreads the stain laterally and drives pigment further into the grain. Remove as much liquid as possible through firm, vertical pressure, then move immediately to the salt method below. Avoid rinsing with hot water at this stage, as heat can accelerate pigment bonding. Cold water only, and briefly.

The Salt Method for Immediate Treatment

Coarse sea salt is the right tool for the first few minutes after a spill. Pour a generous amount – a tablespoon or two – directly onto the stain and press it lightly onto the surface. Salt works by drawing liquid upward and outward through osmosis, pulling the wine away from the grain before it can travel deeper. Leave it to work for three to five minutes, then sweep it away with a dry cloth using outward strokes, never circles. The salt will have taken on a distinctly purple hue, which is satisfying evidence that it has done its job. Follow with a brief cold rinse, pat the board completely dry, and assess. If a faint shadow remains, move on to one of the methods below.


Tried-and-Tested Methods for Dried or Set-In Red Wine Stains

So the board was quietly left on the draining rack overnight, and this morning it is telling a story in burgundy. The salt moment has passed. What you need now is something with a bit more conviction – but still, critically, something that will not punish the wood in the process. These three methods are reliable, genuinely wood-safe, and use ingredients that are almost certainly already in your kitchen or bathroom cabinet.

Bicarbonate of Soda and White Vinegar Paste

Mix one tablespoon of bicarbonate of soda with just enough white wine vinegar to form a thick paste. It will fizz with some enthusiasm, which is entirely normal and mildly satisfying. Apply the paste directly to the stain and work it into the grain using a soft cloth or an old toothbrush, using gentle, deliberate strokes that follow the direction of the wood grain rather than working across it. The bicarbonate provides mild mechanical abrasion that lifts surface pigment, while the acetic acid in the vinegar begins to break down the tannin bonds that have formed between the stain and the wood fibres. Leave the paste to sit for five to ten minutes, then wipe away and rinse with cold water. Pat completely dry. Do not leave the board sitting wet at any stage.

Lemon Juice and Coarse Salt Scrub

This is the more pleasant-smelling option, and it is particularly effective on stains that have set but are not deeply embedded. Cut a lemon in half, press the cut face into a small pile of coarse salt, and use it to scrub directly over the stained area. The citric acid in the lemon juice provides gentle natural bleaching action, working on the pigment at a molecular level, while the salt serves as a fine abrasive that physically lifts discolouration from the grain surface. Scrub for a minute or two, then leave the juice to sit on the board for a further five minutes before rinsing clean. If you have a south-facing windowsill – not always a given in a Chelsea basement flat – placing the board in direct natural sunlight during this time gives a mild photochemical boost to the bleaching process. Rinse with cold water and dry immediately and thoroughly.

Hydrogen Peroxide (Used Carefully)

For older or more stubborn stains that the gentler methods have not fully resolved, 3% hydrogen peroxide – the cosmetic or food-safe grade available from most chemists – is a legitimate and effective step up. Apply a small amount to the stain using a cotton pad, leave it for no more than five minutes, then rinse the surface thoroughly with cold water. Hydrogen peroxide works by oxidising the anthocyanin molecules, effectively bleaching them from within the grain rather than simply abrading the surface. Two important caveats apply. First, always test on an inconspicuous area of the board beforehand, as some wood types and finishes react unpredictably. Second, do not use this method on a recently waxed or heavily oiled board without reconditioning the surface properly afterwards – hydrogen peroxide will strip protective coatings, leaving the wood temporarily vulnerable to moisture and further staining.


What You Should Never Use on a Wooden Chopping Board

This section may be the most practically important in the entire article. The well-meaning but catastrophic interventions are, in professional experience, frequently more damaging than the stain they were meant to address – and the kitchens of Chelsea and Kensington have seen their fair share of both.

Bleach seems like an obvious solution for something this stubbornly pigmented, but it is entirely unsuitable for wood. It aggressively dries out the grain, causes cracking and surface discolouration, and leaves chemical residues on a food-contact surface that simply should not be there. A board that smells of bleach has no business being near food preparation.

The dishwasher is where good chopping boards go to die. The combination of sustained high heat, prolonged moisture exposure, and high-pressure jets will warp, split, and delaminate even a well-constructed board across a handful of cycles. Glued joints fail. Cracks appear along the grain. The board becomes a hygiene liability rather than a kitchen asset – and a surprisingly expensive one to replace.

Steel wool and abrasive scouring pads will remove the visual stain along with the top layer of wood itself, leaving behind a network of fine scratches that harbour bacteria, trap food residue, and make the board significantly more susceptible to future staining. The surface that remains is both less sanitary and less attractive.

Soaking in water is similarly ruinous. Wood swells when waterlogged, then contracts unevenly as it dries – a cycle that leads to warping, splitting, and the kind of persistently wobbly board that serves no one well and eventually becomes unusable.


Reconditioning the Board After Stain Removal – The Step Everyone Forgets

Removing the stain is only the first half of the job, and the second half is the one most people skip entirely.

Any effective cleaning process – particularly one involving acidic agents such as lemon juice, white vinegar, or hydrogen peroxide – will strip some of the protective oils or wax from the wood’s surface, leaving the grain temporarily more exposed and considerably more vulnerable to moisture, bacteria, and future staining. A cleaned but unreconditioned board is, in some ways, more at risk than it was before you started.

Once the board is fully clean and completely dry, apply a generous coat of food-grade oil, working it into the surface with a clean cloth along the direction of the grain. Food-grade mineral oil is the standard recommendation: it is odourless, completely tasteless, does not turn rancid over time, and penetrates the grain effectively. Coconut oil is a popular alternative with a more pleasant scent, though it has a longer absorption time. If your board had a wax finish prior to treatment, a rub with a food-safe beeswax block will restore the surface well. Leave the oil or wax to absorb for several hours – overnight is considerably better – then wipe away any remaining excess. A properly reconditioned board is noticeably more resistant to staining, far easier to clean day-to-day, and will reward the extra ten minutes of attention with years of additional useful life.


Prevention Is Better Than a Ruined Chopping Board

The most effective defence against red wine stains is a board that is regularly oiled and properly maintained – one whose grain channels are already well saturated, leaving significantly less room for wine, berry juice, or olive oil to penetrate. Boards conditioned on a monthly basis absorb liquids far more slowly than dry, neglected ones, which effectively extends your response window considerably when accidents happen.

A few practical habits make a real difference over time. A brief rinse with cold water immediately after contact – before the wine has any chance to begin drying – is vastly more effective than leaving it until the washing up. Keeping a secondary board near any open bottles during preparation is a sensible precaution that takes all of thirty seconds to implement. And ensuring the board is properly dried and stored flat after each wash prevents the warping that makes future cleaning harder and less effective.

The honest truth is that red wine and dinner parties in SW3 are an enduring and entirely non-negotiable combination, and no preparation eliminates the element of human unpredictability entirely. But with a well-oiled board, a packet of coarse sea salt in the cupboard, and a passing familiarity with the methods above, the odds are firmly in your favour.

Cleaning Tips For Lazy Guys And Girls: A Chelsea Resident’s Guide

Maid About to Clean the House with a Vacuum Cleaner
Image kindly provided by Lore Van Caenegem

In the heart of Chelsea, where every second is as precious as the antiques adorning the homes, housework can sometimes feel like an unnecessary chore. But for those who’d rather be attending a tech conference, a private banking gala, or simply lounging with a glass of the finest Bordeaux, there’s a way to keep your home pristine without breaking a sweat. Here’s a guide tailored for the elite who prefer efficiency overexertion. For everybody else, I shall kindly suggest hiring a domestic cleaner in Chelsea.

The Microwave Miracle

Ah, the microwave. That modern marvel that’s saved many a dinner party. But when it’s splattered with last week’s reheated pasta sauce? Not a pretty sight. Instead of scrubbing away, fill a bowl with water, microwave on high for a few minutes, and let the steam work its wonders. Once done, a simple wipe is all it takes. It’s almost like having a personal chef clean up after you.

Blender’s Self-Clean Mode

Morning routines in Chelsea often involve a healthful smoothie, perhaps with a touch of organic kale or a hint of golden honey. But cleaning the blender afterwards? Quite the dampener. Here’s a trick: Fill it with hot water, add a drop of detergent, and blend. It’s like giving your blender a spa day, and it comes out looking brand new.

The Slide & Shine Technique

Maid Mural by Banksy
Image kindly provided by robra photography []O]

Why simply walk when you can glide? Especially when your floors can benefit from it. Sliding across your wooden or tiled floors in plush socks is not just an exercise in grace; it’s functional. As you move, you gather dust and fluff. And if you’ve recently applied polish, you’re also giving it a nice buff. It’s multitasking with a touch of ballet.

Bed-Making Made Easy

The bed, that sanctuary where dreams unfold. But making it every morning? Quite the chore. If tucking in sheets feels like a workout, use a blanket pin to anchor them. It’s a small change, but it ensures your bed always looks as inviting as a suite in a five-star hotel.

Vacuum’s Versatility

Vacuums, those trusty devices that remind us of our childhood chores. But in the hands of a Chelsea resident, it’s a tool of versatility. Use it on windowsills, skirting boards, and even upholstery. With the right attachments, it can be as versatile as a Swiss Army knife.

Overnight Bath Cleanse

After a long day, a bath can be a sanctuary. But when it’s marred by rings and stains? Less so. For an effortless cleanse, fill your tub with warm water, sprinkle in some biological washing powder, and let it sit overnight. By morning, it’ll gleam, making your next soak even more enjoyable.

Quick Decluttering Hack

We’ve all had those moments. An unexpected guest, perhaps a colleague from the tech world or a banker friend, and the house is a mess. The laundry hamper, often overlooked, becomes your secret weapon. Swiftly gather stray items, tuck them away, and your home is transformed. Once the coast is clear, you can retrieve and organise at leisure.

The Toilet’s Best-Kept Secret

The toilet, a necessity, but often overlooked in the cleaning routine. Those blue detergent blocks are more than just aesthetic. They work tirelessly, ensuring every flush leaves your toilet bowl cleaner than before. It’s like having a butler for your bathroom.

Swift Shower Maintenance

Showers are rejuvenating, but cleaning them? Not so much. Here’s a tip: after your shower, use a towel to wipe away water droplets and soap scum. It’s a habit that takes a minute but saves hours in the long run.

Victorian Chelsea Maid with an Early Vacuum Cleaner
Image kindly provided by Matthew Paul Argall

Rapid Bathroom Floor Refresh

The bathroom floor is often a magnet for stray hairs and dust. For a quick refresh, splash some warm water mixed with detergent, then mop it up with a towel. It’s a simple act, but the results are astounding.

The Living Room Lounge

The living room, where guests are entertained and memories made. But dust can accumulate. Instead of the usual dusting routine, use a soft-bristled brush. It’s gentler on surfaces and picks up more dust. And for those wooden surfaces, a touch of olive oil can bring out a shine that rivals the London sun.

The Kitchen Quick-Fix

The kitchen, the heart of the home. But with cooking comes mess. For quick countertop cleans, a mixture of vinegar and water in a spray bottle works wonders. And for those stainless steel appliances? A dab of baby oil on a cloth brings out a mirror shine.

In the end, cleaning doesn’t have to be a Herculean task. With these tips, even the laziest among Chelsea’s fashionable residents can have a home that’s both elegant and spotless. Here’s to a life of luxury with a touch of practicality. Cheers!

Domestic Cleaning: The Not-So-Glamorous Affair That’s Secretly Running the World

Ah, domestic cleaning. The unsung hero of our daily lives, the silent partner in our domestic dance, and the topic you never knew you needed to read about until now. Let’s embark on a journey through the sparkling world of cleaning, where we’ll uncover the secrets, the laughs, and the sheer genius behind those lemony-fresh scents.

Image kindly provided by dackelprincess

1. The Basics of Cleaning: More Than Just a Swipe and Wipe

The art of making your home look like you haven’t lived in it.

Ah, the daily grind of cleaning. It’s the routine that keeps our homes from looking like a scene from a post-apocalyptic movie. But what if I told you there’s an art to it?

  • Daily tasks: Every morning, as the sun peeks through the curtains, there’s a symphony of cleaning rituals taking place across the nation. From the gentle swish of the broom to the rhythmic dance of the mop, it’s a ballet of cleanliness. And let’s not forget the aroma of fresh lemon that signals a job well done. Or is it just a cover-up for last night’s curry?
  • Weekly tasks: Ah, the weekly deep dive. This is where we tackle the messes that have sneakily built up over the week. It’s like a mini spring cleaning but without the existential dread.
  • Monthly tasks: The “Oh, I forgot about that!” tasks. Like cleaning behind the fridge. Or discovering that lost sock that’s been MIA since 2003.

2. The Spooky Side of Cleaning: Halloween Edition – Where Even Ghosts Fear to Tread

Historic homes, eerie encounters, and the chilling tales of dust bunnies.

As Halloween approaches, there’s an added layer of spookiness in the air. The cobwebs you’ve been ignoring suddenly become seasonal decor, and that creaky floorboard? Well, it’s just setting the mood, isn’t it?

  • Historic homes: With walls that have seen centuries pass by, historic homes are a treasure trove of tales. As you dust off ancient mantelpieces and polish age-old bannisters, one can’t help but wonder: Are you disturbing the spirits of yesteryears or just the remnants of last year’s Halloween party? Perhaps that old dust is actually the ashes of a Victorian vampire’s last meal.
  • Unexpected scares: Picture this: You’re cleaning an old mansion, the dim light casting eerie shadows. The anticipation of Halloween is palpable. And then… a broom falls on your head. Not quite the ghostly apparition you were expecting, but it’s a start. And that mouse that darted out? Maybe it was just a tiny werewolf in disguise.

As you prepare for Halloween, remember that every creak, every unexpected gust of wind, and every misplaced item might just be a playful spirit reminding you of the spooky charm of the season. So, embrace the chills, enjoy the thrills, and maybe leave a candy or two out for the ghosts – just in case.

3. The Cleaning Lady Chronicles: More Than Just a Swipe and a Smile

Behind the scenes with the unsung heroes of cleanliness.

  • Daily routines: Even cleaning ladies need a break. After a hard day’s work, there’s nothing better than kicking back with a cuppa and some Netflix. And yes, they judge the cleanliness of the homes in the shows they watch.
  • Client Relationships: From the little ‘ole ladies who see you as their adopted grandchild to the hopeful bachelors who think a clean home is the way to a woman’s heart, cleaning is more than just a job. It’s a window into the human soul.

4. Because Life’s Too Short to Take Cleaning Seriously

The lighter side of the cleaning world.

  • Cleaning Confessions: We’ve all been there. That moment when you find something so bizarre while cleaning that it leaves you scratching your head. Like the time I found a collection of rubber ducks in a client’s oven. A new take on roast duck, perhaps?
  • Cleaning Quotes: “You call it spring cleaning, I call it the annual purge.” Or how about, “My idea of a deep clean is throwing everything into a cupboard and hoping for the best.”

In conclusion, domestic cleaning might seem like a mundane task, but it’s a world filled with humour, history, and a touch of the unexpected. It’s the unsung hero of our daily lives, the silent partner in our domestic dance, and the topic that’s more fascinating than you ever imagined. So, the next time you pick up that mop or duster, remember: you’re not just cleaning, you’re part of a grand, sparkling tradition. Cheers to the unsung heroes of cleanliness!

Make Your Life Easier by Hiring a Housemaid

Nowadays, many people spend so much time away from home that they sometimes wonder if it makes sense to live there. Housework requires so much personal time that it can be downright impossible. People tend to forget that it is crucial to take care of the home first. By the time you get home from work, you’re so tired that the least you want to do is clean up. You feel too exhausted to deal with the clutter throughout the house. 

Hire a house maid to help you with the cleaning

But there is an easy way to solve this problem. Once you realise that you are too busy cleaning and tidying and have a lot to do, hire a maid or house cleaning service to do it for you. There are several benefits to using this type of service. The first and most obvious is that your home is clean and habitable. You may not recognise your location after such cleaning. Instead of ordering food from outside, you will have time to start cooking and enjoy delicious healthy homemade food. You may come across clothes you were looking for but could not find. With the help of professional cleaners, the days of insecurity and fatigue are long gone. 

Using a cleaning service can also benefit your personal life. Instead of being ashamed to invite friends and family over to the mess, you can feel confident and have company again. That will impress your visitors with impeccable purity and brilliance. They all know how busy your schedule is. So, they will wonder how you manage to keep your home clean. 

To find a good cleaning company, search online or find recommendations. You want to use a service that most of their previous customers have been happy with and are likely to hire again. You can also call the company and check for some of their recommendations. Ensure that all company employees have undergone an in-depth inspection. The company has insurance for its employees, which states they are guaranteed not to engage in dishonest acts during work. That protects your home and property against any loss due to theft or unfair practices by their employees. 

Busy work schedule 

After all, the only reasonable way to make your daily life easier is to find time for yourself. It is well worth spending a few pounds on happiness and stress-free life. Most agencies provide services almost everyone can afford, even those with a limited budget. 

Busy family life 

Spending time with your family is challenging when you are busy cooking, cleaning, washing and caring for other household chores. Keeping the house in order becomes a terrible task if you already have a busy schedule. Both work pressure and the burden of the home will eventually lead to unhappy lives and affect your married life and health. 

If you have someone in your house to take care of all these household chores, you can safely go on a family walk to make your children happy or even have a date with your loved one. Hiring a cleaning service will reduce stress and help keep your marriage and personal life intact. 

Party without fuss and stress 

Are you planning a big event at home? Are you planning to bring your friends to a gathering? You will also need to add cleaning to your list. It can significantly interfere with your party mood and even interfere with the arrangements for the event. But you can hire someone to clean the house before and after the party, saving you time and energy. Knowing that you have a directly hired maid will take the burden off your shoulders. You will make the party a hit. 

You can’t do the cleaning 

Do you remember when you made up excuses while your mother begged you to clean the house? All right. Now you know why cleaning is not your thing. Cleaning does not involve simply turning on the vacuum cleaner or washing some dishes. You need to learn some tips before diving into the activity. 

Many maids are also trained to help look after babies or the elderly and do household chores. So if you have a toddler or an adult at home, take advantage of their invaluable services. 

Stop bothering and hire a housekeeper from a maid agency because they can clean the house flawlessly in no time and provide you with all the much-needed rest. They can make your life easier and help you spend time with yourself and your family. 

What about a house cleaning service? 

The home cleaning service provides significant benefits that will make your life better. Why do our clients hire us to do the cleaning for them? Because we are better at it, and it frees them to do more important things. Hiring someone to clean your home will give you valuable time to invest in yourself, your family, your hobby, or anything that brings you joy. 

When it comes to allergies, regular planning of home cleaning services offers you two main benefits: 

  • It keeps allergens away; 
  • That allows you to clean when the allergic patient is not present. 

The benefits of hiring a home cleaning service go beyond cleaning. 

A home cleaning service will reward you with the following: 

  • time to do what you love; 
  • less stress; 
  • healthier home without allergens; 
  • a safer environment for your family; 
  • all the factors that contribute to improving your life. 

You deserve some rest 

Sometimes you need a break from all those everyday chores. Doing a body massage or yoga session is great, but you can also pamper yourself by hiring a house cleaning service. It will give you enough rest and help you regain your energy. Just relax and rent one. You deserve it! 

Kitchen Space-Easy Habits For Excellent Cleanliness

Kitchen is maybe the most used dwelling at home. It is much more than a place where we prepare meals. Here we can share spare time, sweet conversations, game moments, delicious experiments, enjoy cooking, organise meetings.

When the family members are together in the kitchen could be significant, fantastic and unforgettable, but everything can look like a disaster after the common experience ends.

No matter which day of the week is and how tired you are, it is vital to be responsible for some basic things in that part of the home.

Quick Cleaning Tips:

  • Gather up all of the possessions which belong to the other rooms; 
  • Always wash the dishes after cooking and eating or load the dishwasher;
  • Never postpone wiping down the table, countertops and appliances used while preparing the meals;
  • Be careful with the humidity; take care of the ventilation system and range hood diligently; utilise them when necessary; open the windows frequently;
  • Dry the countertops and other surfaces; always absorb any drips that occur;
  • Clean floors, appliances, devices, windows and light fixtures; they must be a priority;
How To Keep Our Kitchen In Appropriate Shape-It’s Easy

With regular maintenance and thorough care, your kitchen will be sanitised and looking perfect.